MRMO-Halftone
Basic usage tutorial and tips!
I've formatted this in a FAQ form- if any new questions crop up, I'll try and answer them here!
Will this work on my PC?
-If Blender (at least version 3.1) works on your PC, then MRMO-Halftone should work too. It is relatively taxing on the hardware, so having a dedicated video card definitely helps run it faster!
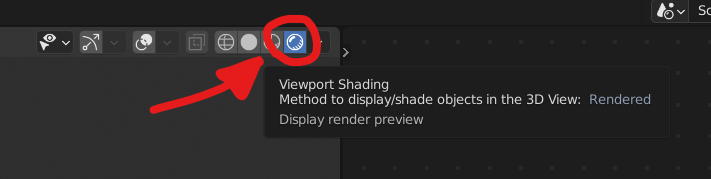
I opened the .blend scene, but all I see is a gray square! How do I preview the result?
-When you open the included .blend file in Blender, change the viewport shading mode to "Rendered" here:
Alternatively, you can hold the default shortcut key "Z" and move the mouse cursor towards the "Rendered" option:

You should now be able to preview the results in the viewport!
I'm new to Blender, how do I render stuff? How do I save the rendered result?
-When you open the included .blend file in Blender, hit "F12" or go to "Render->Render Image" in the main menu on the top of the screen! After some time, Blender should produce the render result. You can then save it using the "Alt-S" shortcut (or, in the menu, "Image->Save As"). You should be able to return to the viewport preview with the "Esc" shortcut.
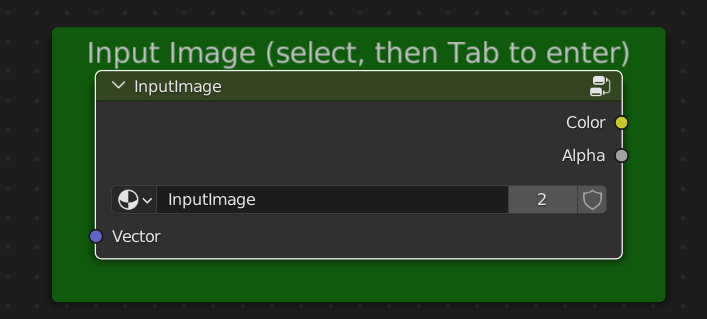
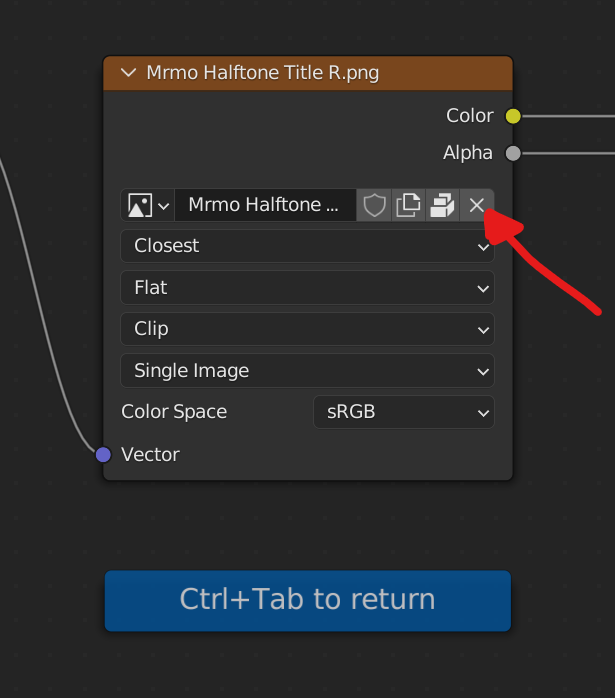
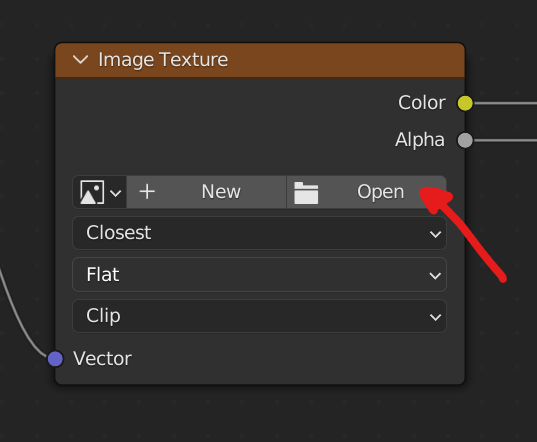
How do I change the input image?
-When you open the included .blend file in Blender, in the "Shader Editor" area on the right side select the "Image" node (in the green frame, the one that has the "Tab to enter" label on top of it). Hit "Tab" to enter the node group, and click the "X" icon in the "Image Texture" node (labeled "Input Image"). This will clear the pre-set image, and allow you to choose your own by selecting the "Open" option that should have appeared by now.
You can exit from the "Input Image" node group by hitting "Ctrl+Tab".
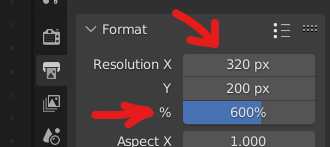
How do I change the render resolution?
-In the "Properties" area on the right side, select the "Output Properties" tab (the one with the printer icon!). You can change the resolution of the rendered image, the percentage scale of the resolution, as well as the file format and output directory if you're rendering an animation. The canvas size, as well as the camera scaling, should then automatically adapt to the new resolution.
I recommend you set the input resolution to the exact resolution of your input image, and control the render result dimensions using the percentage scale (for example, 400% of a 320 x 200 px would produce a 1280x800 px render result).
The image takes too long to render!
-If reducing the render resolution as described above is still not enough, you can try reducing the amount of render samples (this degrades the render quality somewhat). In the "Properties" area on the right side, select the "Render Properties" tab (the one with the photo camera icon!). There, under "Sampling", you can reduce the amount of render samples and try rendering to see how it affects the rendering time.
The "Render" value affects the quality of the rendered result, while the "Viewport" value affects the quality of the realtime viewport preview. Consider setting these values so that the "Viewport" value is lower than the "Render" value, and you will have a more responsive preview while retaining the render quality!

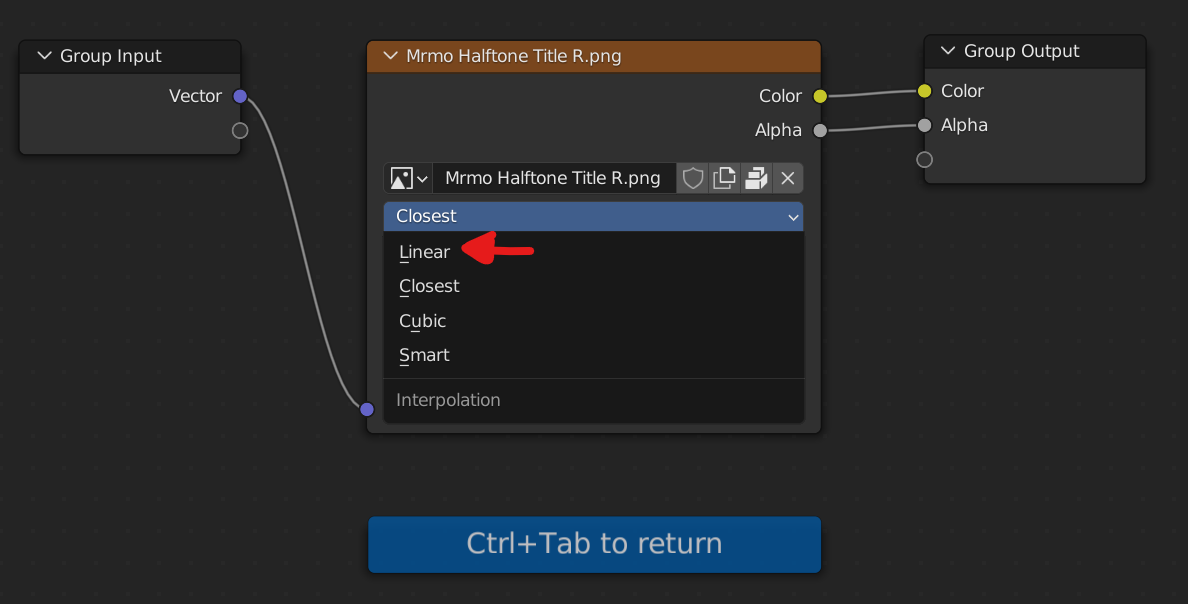
The image appears too blurry or too sharp!
-Consider switching the image filtering modes in the "Input Image" Image Texture node between "Nearest", "Linear" and "Cubic", as they can give different results depending on the content of the input image texture. Also consider pre-upscaling your input image (as in, exporting it at a larger scale before loading it into Blender!) to 400% or 800% if it's a lower resolution image (e.g. pixel art). This can help it remain sharp when using "Cubic" and "Linear" image filtering modes, while reducing unwanted hard edges of the halftone pattern.
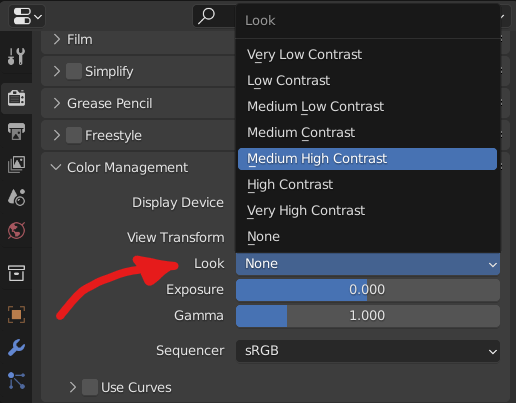
Can I increase the contrast of the rendered image?
Yes you can! :D
In the "Properties" area on the right side, select the "Render Properties" tab (the one with the photo camera icon!). Under "Color Management", you can change the "Look" to one of the presets- the default Look is "None", but you can increase (or decrease) the contrast using those presets. You can also tweak the overall exposure and gamma using the sliders.
Leave a comment
Log in with itch.io to leave a comment.