Heya! I love this so much and am using it for a specific project currently and have purchased the Deluxe version. Thank you! Quick question, I am importing images that are different sizes but they are always imported and stretched to a predefined aspect ratio and scale. Is this able to be changed as I need a specific scale
Hello and thanks a bunch for supporting me :) This "manual" is kind of buried at the bottom of the page and I have to do something to make it more visible, maybe link to it in a readme or somewhere from the top of the project page :/ Please take a look and see if it helps, otherwise I'm available to provide support if needed!
Been a big fan of your stuff for a while and was trying to make use of this for my print making class :) however when i put an image through the blender file it seems like it fails to recognize green? I have attached the finished render and the original image to showcase. Currently using blender 4.3.2 on a mac :)
Thanks for reaching out quickly! I tried setting the colors of everything to be "true" CYMK and the old version seemed closer to the original image , it seems to be struggling to put yellow and blue together to make green just in general :/ Also wanted to mention that i tried setting it up that the image exportorted straight to the material and that it looked exactly like the original image
Okay! I decided I like your program enough that I would purchase it anyway and that seemed to fix my problems (or at least gave me the options to fix it myself) :P
Thanks so much for helping with the technical problems :) I'll send you updates if I can use it for my class
One thing on my wish list is more paper distress options. Stuff like magazines and game manuals is rarely "crumbled up" completely, especially near the center of the page. Usually creases occur near the edges, when people leaf through them. Not sure how to choose how to spread it around, though. Stuff like dog ear marks would also be amazing.
While I'm dreaming I'd also love textures for the midfold:
Thanks a bunch for your support! I'm glad you like this project :D
Yeah, both exposing the crumple node (that is, making it easier to accept custom textures) and using displacement to modify the geometry in Cycles would be possible!
Currently, you can get to the textures by digging into the main node group :)
Of course! I stumbled on your work after googling around to see who makes the best print emulator these days (I'm a digital graphic artist with a penchant for physicality), and I was shocked to find such a refined and robust tool.
That's fantastic; thank you for confirming. If it wouldn't be too much trouble, could you point me in the direction of how to modify the shader in those two ways?
If not, perhaps consider them as feature requests for a future update? ;)
Hey! To clarify, you would like a transparent png as the result of the process? It should be possible with modification, but the entire process relies on the underlying "paper" to be there to mix the "inks" on, so the result would probably not be what you expected :)
Do check the comments section, I've posted a possible method to get this done :)
A youtube video would be so great to watch for educational purposes. This has been the most detailed and user-friendly halftone node I've seen for blender, and I love that it works with Cycles. Thank you so much!
This is amazing! I've been playing with it a lot and I can't get enough. One thing I don't seem to be able to do: Is there a way to set the paper/background alpha transparency in any way? After getting into the 4th or 5th node layer I thought it might be easier to just ask.
Hey! The way the process works is by calculating separate C, M, Y and K values using the input image, and mixing an appropriate amount of "inks" on top of a "paper" backdrop, very similar to how actual printing works. You could get the "inks" value separately, but as there's no "white", any bright areas would result in transparency (the process basically overlays this result on top of a "paper" texture).
You could get around this by mixing the entire shader with a transparent shader using the input image's alpha as factor, like so:
The alpha obtained this way is not perfect, though. Another, more complicated way would be to introduce a "fifth ink", based on the alpha instead of colors, which would make the transparency "halftoned" too; this would require modifying the halftone subprocess group to have an additional "alpha" output, and using that as the mix shader factor instead. This would also definitely fall outside of the scope I designed the process for :)
Thanks so much for the answer. Indeed the transparency looks a bit weird with this method, but your explanation was really helpful and the nodes are starting to make more sense as I delve deeper. Just editing the interpolation type of the texture changes the end result completely.
I'll experiment with the setup to see if I can find ways to accomplish transparency and post it here if anyone needs it. Thanks for making this tool, it's a joy.
Depends on how you want to do it; the shader process is completely contained within Blender and does not work outside of it, so you wouldn't be able to use it realtime in Unity. You can render assets as textures in Blender, save them as images and use the result in Unity.
Awesome tool! When trying the Paper Crumpling my version doesn't look like yours, though, more like dark cloudy noise. Is there something I'm missing? Thanks!
Hey! This requires me to do some troubleshooting, could you please share your basic hardware specs? Also, what OS and Blender version you're using?
At a first glance, this looks like a Blender issue of some sort, I've tested the process on the lowest-end hardware I could find that still can run Blender 3.x (an i5 laptop from 2015 with integrated graphics, running Windows 10), and after chugging along compiling shaders for almost a minute, it produced the correct result :/
Also, if you enter the shader node, and connect the "Light Normal" to the Group Output, what does the result look like?
Also, does changing the values in the "Lighting Setup" node do anything? I've managed to reproduce your result by setting all three light intensities to 0, which leads me to believe there's something wrong with how Blender does calculations there.
Hello! I'm using windows 10, Blender 3.0.0 Plugging the light normal in directly just gives me a black square. Changing values in the lighting setup node doesn't do anything.
Actually, I do see a paper displacement and paper normal in the render, but I guess the normal isn't in the final result? Also not sure why it doesn't show up in the editor either.
Thank you for helping me troubleshoot this; I've downloaded Blender v.3.0.0 and it is indeed a Blender version related issue.
In the "Normal Paper Texture" node group, these nodes are not connected properly if opened with older Blender versions, due to Map Range node being updated to support Vector inputs.
If you're unable to use a newer Blender version with MRMO-Halftone, you can bridge the missing connection like so:
This should allow you to use the "Paper Crumpling" feature, as it should now generate a valid output.
first of all, this is awesome. it looks really good.
second point is if it would be possible to auto detect the aspect ration of the input image because it's default state works well on landscape images, but throw something in with more vertical space and you have to go in and adjust your sizes so you don't end up with a distorted mess.
Hey! I've identified the problem, and will try to implement a solution as soon as I can! The halftone pattern scale is not calculated correctly for vertical-oriented image textures, and I think I know how to fix it :)
With the Basic license can I use this for advertising, or should I purchase the Deluxe version? (Just genuinely not sure where advertising falls in the commercial/non-commercial space)
1. Are you getting paid to make the advertisement? 2. Are you making it for a commercial entity (i.e. a business)? 3. Is it advertising something that is intended to make money?
If you answered yes to any of those questions, I'm pretty sure the answer would be that it is commercial use, legally speaking. Of course, the creator can always choose to allow you to use it even if your use is commercial in nature
Thank you for the info! I ended up buying it anyway, partially just to be safe, partially because I do think it counts as commercial, and partially just to support the dev.
← Return to CMYK print emulation
Comments
Log in with itch.io to leave a comment.
Heya! I love this so much and am using it for a specific project currently and have purchased the Deluxe version. Thank you! Quick question, I am importing images that are different sizes but they are always imported and stretched to a predefined aspect ratio and scale. Is this able to be changed as I need a specific scale
Many thanks!
Hello and thanks a bunch for supporting me :)
This "manual" is kind of buried at the bottom of the page and I have to do something to make it more visible, maybe link to it in a readme or somewhere from the top of the project page :/
Please take a look and see if it helps, otherwise I'm available to provide support if needed!
Heyyo!
Been a big fan of your stuff for a while and was trying to make use of this for my print making class :) however when i put an image through the blender file it seems like it fails to recognize green? I have attached the finished render and the original image to showcase. Currently using blender 4.3.2 on a mac :)
Hey! It's due to the ink colors being used not "true" cyan, magenta and yellow; could you change them and see if it's any different?
Thanks so much for helping with the technical problems :) I'll send you updates if I can use it for my class
Looks fantastic!
One thing on my wish list is more paper distress options. Stuff like magazines and game manuals is rarely "crumbled up" completely, especially near the center of the page. Usually creases occur near the edges, when people leaf through them. Not sure how to choose how to spread it around, though. Stuff like dog ear marks would also be amazing.
While I'm dreaming I'd also love textures for the midfold:
Hey! I'll look into making more options, thanks for the references! :D
Can i purchase this, then reverse engineer it into a glsl shader for a video game?
Yes! And please show the results! :D
After playing with the full version for a bit, here are two (and a half) thoughts:
1. This project is an incredible feat of ingenuity. Hats off!
2. Would it be possible to expose the paper crumpling node as an input to accept other displacement / normal maps as textures?
2a. Could this property then be used to drive "real" displacement of the plane using Cycles?
Thanks for any insight you may be able to share; my node knowledge is rather abysmal :)
Thanks a bunch for your support! I'm glad you like this project :D
Yeah, both exposing the crumple node (that is, making it easier to accept custom textures) and using displacement to modify the geometry in Cycles would be possible! Currently, you can get to the textures by digging into the main node group :)
Of course! I stumbled on your work after googling around to see who makes the best print emulator these days (I'm a digital graphic artist with a penchant for physicality), and I was shocked to find such a refined and robust tool.
That's fantastic; thank you for confirming. If it wouldn't be too much trouble, could you point me in the direction of how to modify the shader in those two ways?
If not, perhaps consider them as feature requests for a future update? ;)
Help! Im using Blender 3.6.1 and it's not working!
Oh! Could you describe what happens? I'm currently traveling and don't have access to a pc, but I'll try and troubleshoot this if possible :)
If it's not too much of a bother, could you try it on an earlier build of blender (3.5 for example)?
So I tried it with 3.1.10 but the image showed as blank! (The preview wasn't showing at all)
Hey! Have you checked the "basic usage tutorial"? Does Blender generally work okay on your machine?
Oops never read the tutorial lol it works now thank you so much!
Great! I'm glad it works, hope you'll have fun with it! :D
I also tried it with 3.1.2 but that didn't work ether!
Thinking it might be my computer...
Hi, first, thanks for your hard work to bring this amazing tool.
Is there a way to have a png image with transparent background?
Hey! To clarify, you would like a transparent png as the result of the process? It should be possible with modification, but the entire process relies on the underlying "paper" to be there to mix the "inks" on, so the result would probably not be what you expected :)
Do check the comments section, I've posted a possible method to get this done :)
A youtube video would be so great to watch for educational purposes. This has been the most detailed and user-friendly halftone node I've seen for blender, and I love that it works with Cycles. Thank you so much!
This is amazing! I've been playing with it a lot and I can't get enough. One thing I don't seem to be able to do: Is there a way to set the paper/background alpha transparency in any way? After getting into the 4th or 5th node layer I thought it might be easier to just ask.
Hey! The way the process works is by calculating separate C, M, Y and K values using the input image, and mixing an appropriate amount of "inks" on top of a "paper" backdrop, very similar to how actual printing works. You could get the "inks" value separately, but as there's no "white", any bright areas would result in transparency (the process basically overlays this result on top of a "paper" texture).
You could get around this by mixing the entire shader with a transparent shader using the input image's alpha as factor, like so:
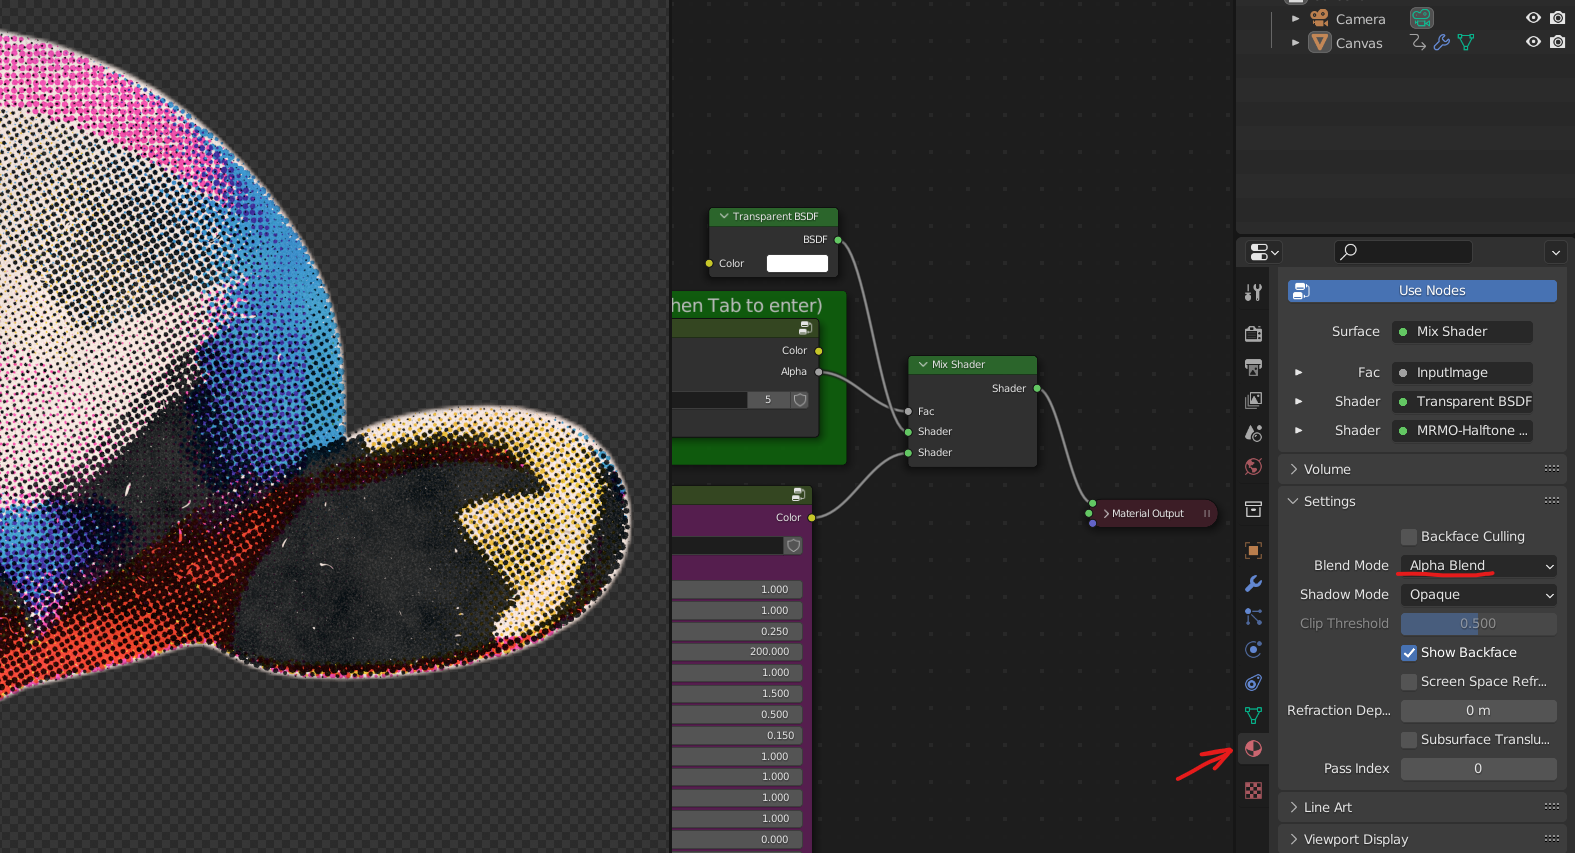
The alpha obtained this way is not perfect, though.
Another, more complicated way would be to introduce a "fifth ink", based on the alpha instead of colors, which would make the transparency "halftoned" too; this would require modifying the halftone subprocess group to have an additional "alpha" output, and using that as the mix shader factor instead. This would also definitely fall outside of the scope I designed the process for :)
Thanks so much for the answer. Indeed the transparency looks a bit weird with this method, but your explanation was really helpful and the nodes are starting to make more sense as I delve deeper. Just editing the interpolation type of the texture changes the end result completely.
I'll experiment with the setup to see if I can find ways to accomplish transparency and post it here if anyone needs it. Thanks for making this tool, it's a joy.
Any introduction help of how can I integrate this in a Unity project?
Depends on how you want to do it; the shader process is completely contained within Blender and does not work outside of it, so you wouldn't be able to use it realtime in Unity. You can render assets as textures in Blender, save them as images and use the result in Unity.
Thanks for the suggestions :)
Awesome tool! When trying the Paper Crumpling my version doesn't look like yours, though, more like dark cloudy noise. Is there something I'm missing? Thanks!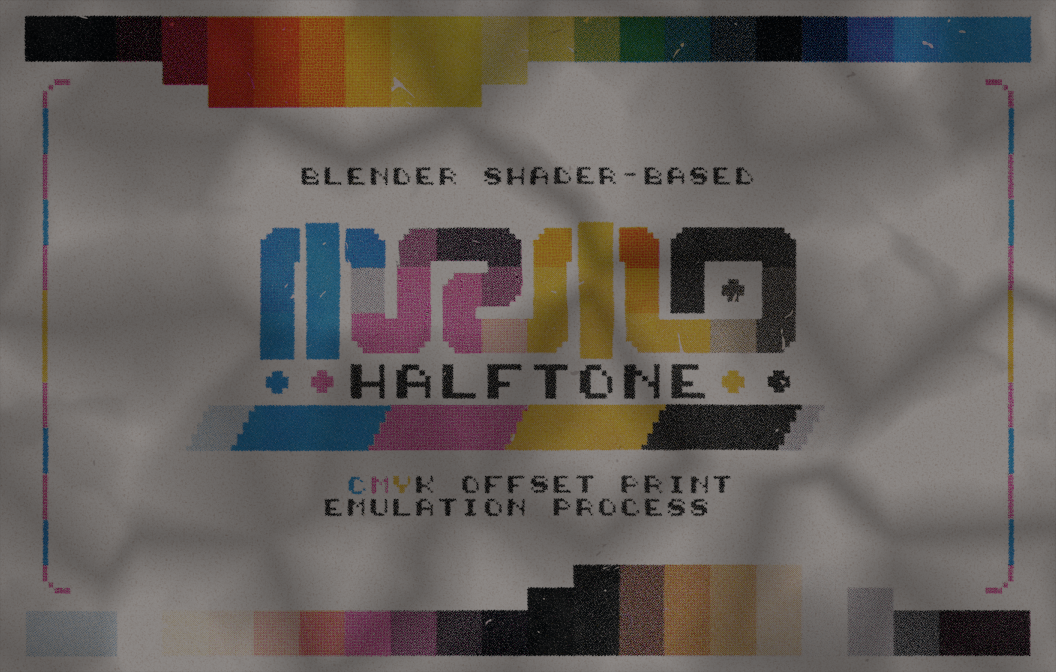
i have that too. i couldn't figure out why his examples of the paper crumpling looked cleaner
Hey! This requires me to do some troubleshooting, could you please share your basic hardware specs? Also, what OS and Blender version you're using?
At a first glance, this looks like a Blender issue of some sort, I've tested the process on the lowest-end hardware I could find that still can run Blender 3.x (an i5 laptop from 2015 with integrated graphics, running Windows 10), and after chugging along compiling shaders for almost a minute, it produced the correct result :/
Also, if you enter the shader node, and connect the "Light Normal" to the Group Output, what does the result look like?
Also, does changing the values in the "Lighting Setup" node do anything? I've managed to reproduce your result by setting all three light intensities to 0, which leads me to believe there's something wrong with how Blender does calculations there.
Hello! I'm using windows 10, Blender 3.0.0
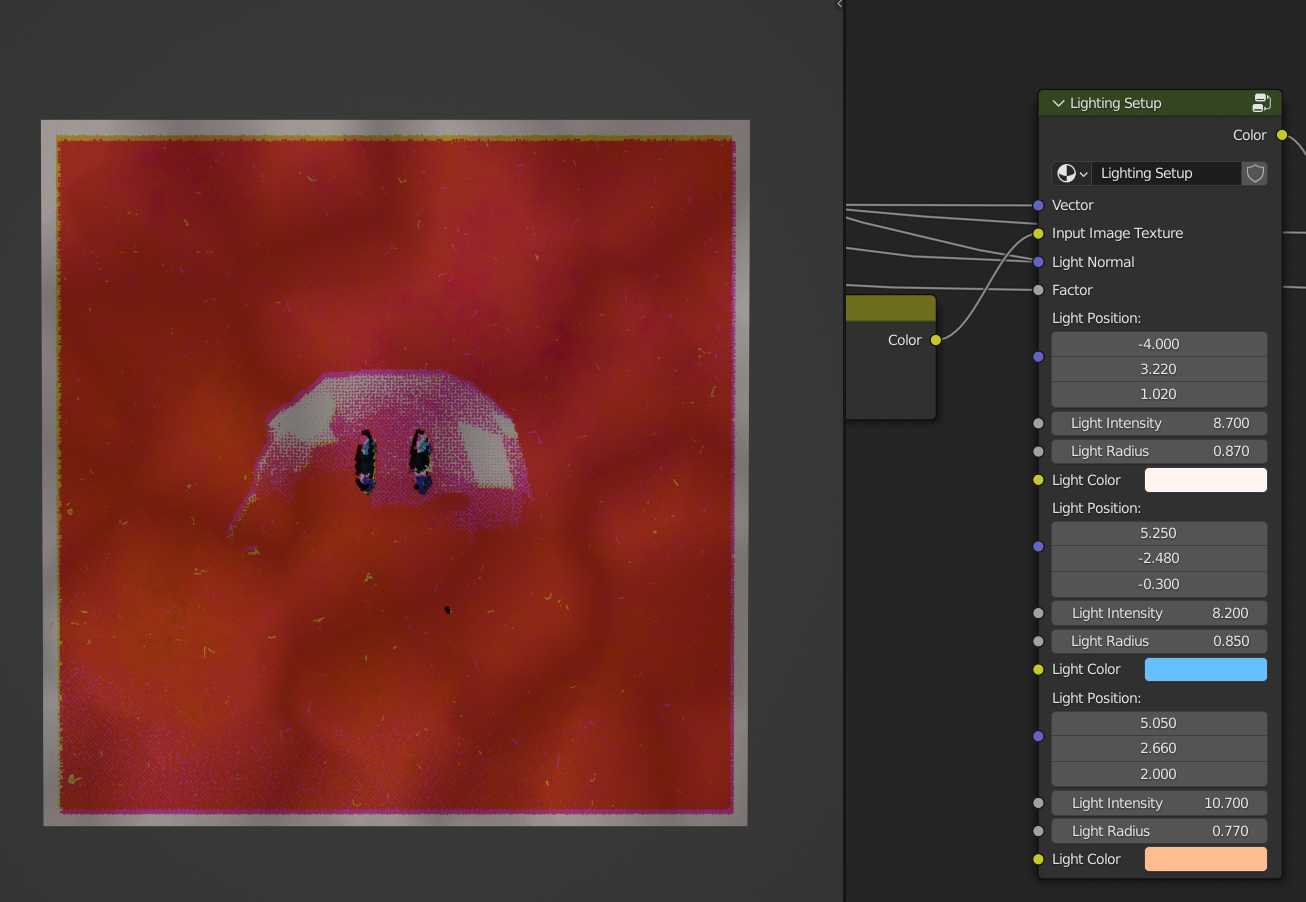
Plugging the light normal in directly just gives me a black square.
Changing values in the lighting setup node doesn't do anything.
Actually, I do see a paper displacement and paper normal in the render, but I guess the normal isn't in the final result? Also not sure why it doesn't show up in the editor either.
Thank you for helping me troubleshoot this; I've downloaded Blender v.3.0.0 and it is indeed a Blender version related issue.
In the "Normal Paper Texture" node group, these nodes are not connected properly if opened with older Blender versions, due to Map Range node being updated to support Vector inputs.
If you're unable to use a newer Blender version with MRMO-Halftone, you can bridge the missing connection like so:
This should allow you to use the "Paper Crumpling" feature, as it should now generate a valid output.
first of all, this is awesome. it looks really good.
second point is if it would be possible to auto detect the aspect ration of the input image because it's default state works well on landscape images, but throw something in with more vertical space and you have to go in and adjust your sizes so you don't end up with a distorted mess.
Hey! I've identified the problem, and will try to implement a solution as soon as I can!
The halftone pattern scale is not calculated correctly for vertical-oriented image textures, and I think I know how to fix it :)
cool. thanks for the update
this is irrelevant but man it would be cool if you had a glitch art blender shader.
This is truly amazing. The results are stunning
Thank you, I'm glad you like it!
When I press f12 to render, the render is tiny and pixelated, what is wrong?
Be sure to set the resolution along with scaling here!
(For example, 320x200 resolution with 400% scaling will produce a 1280x800 render!)
You can click on the percentage value and type in your own :)
Oh there we go
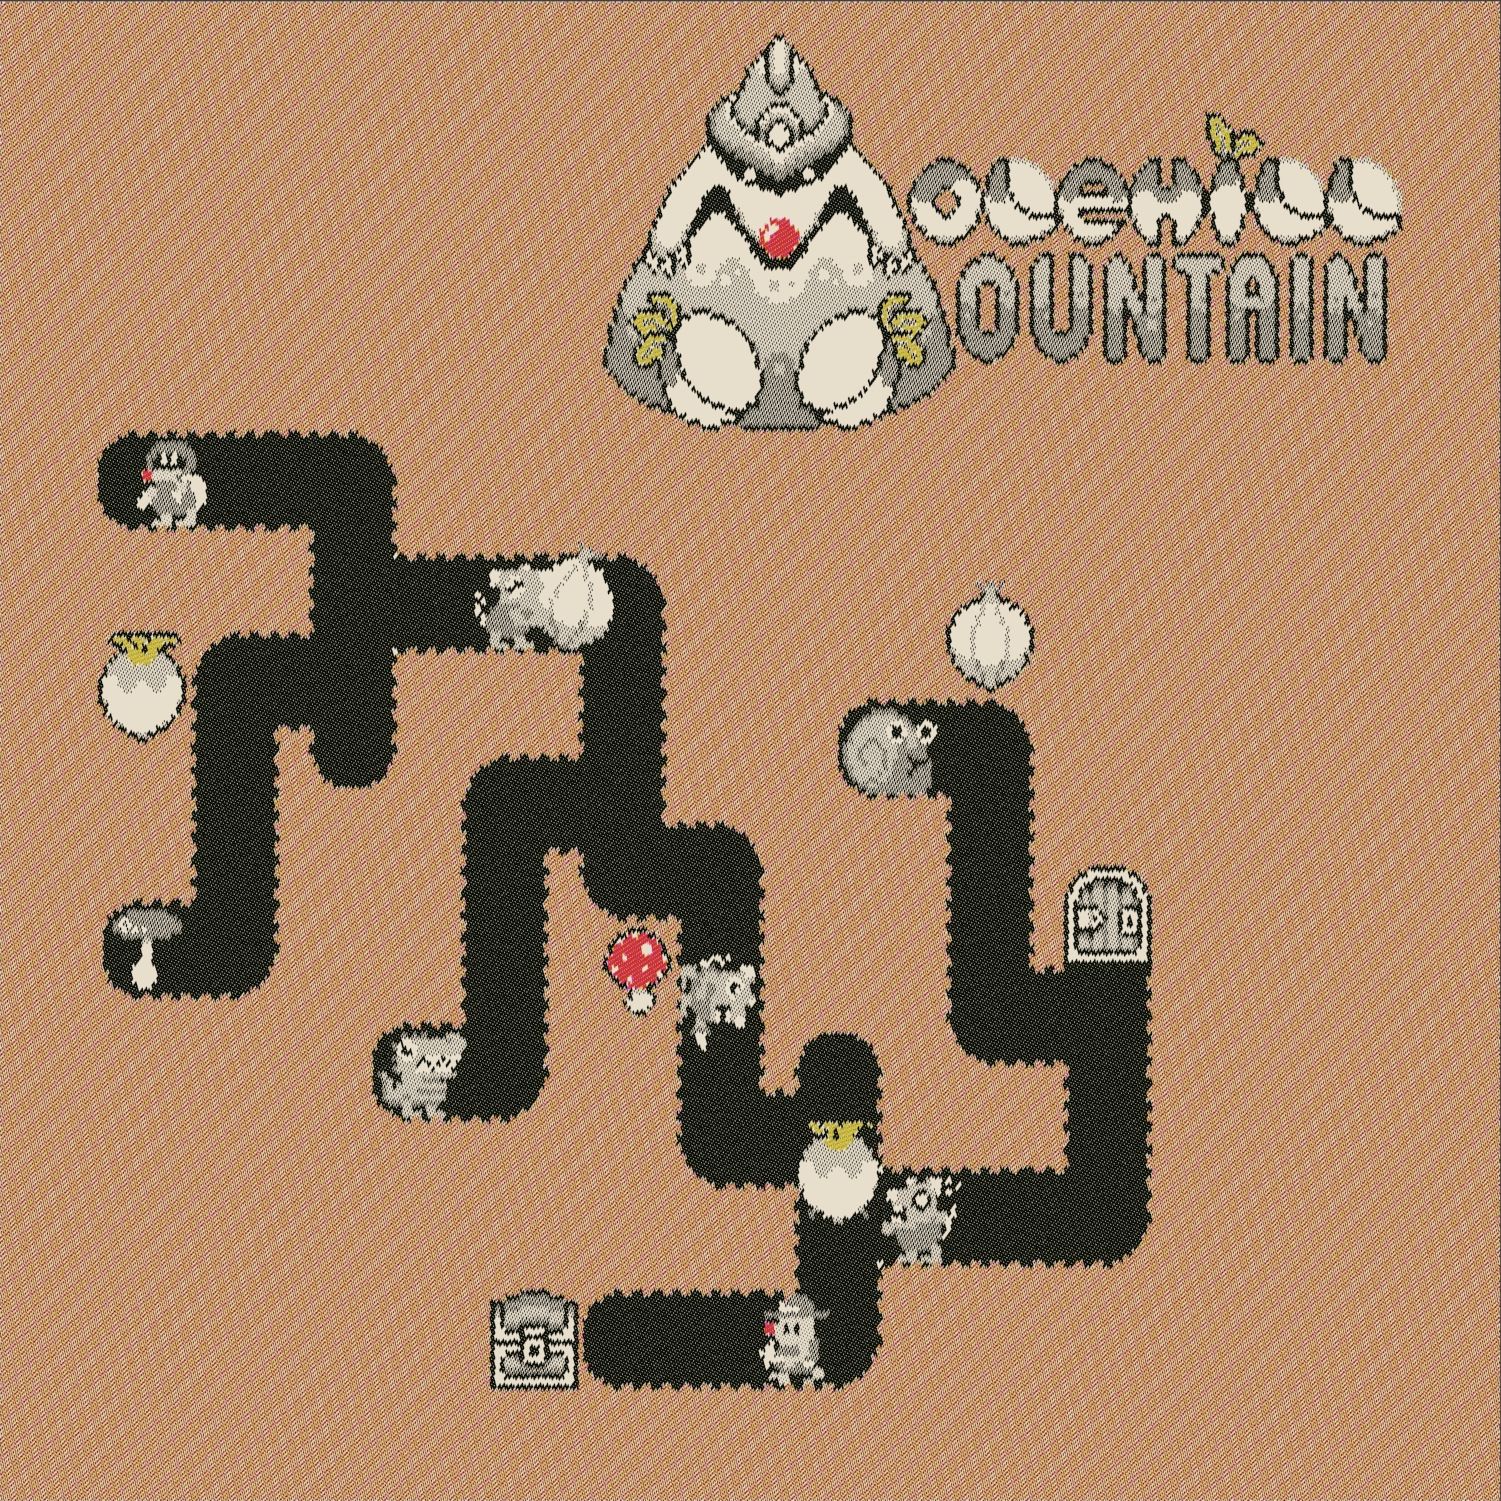
Yay!
Can we have instructions, I am having trouble bringing images in.
When I open the file is just grey.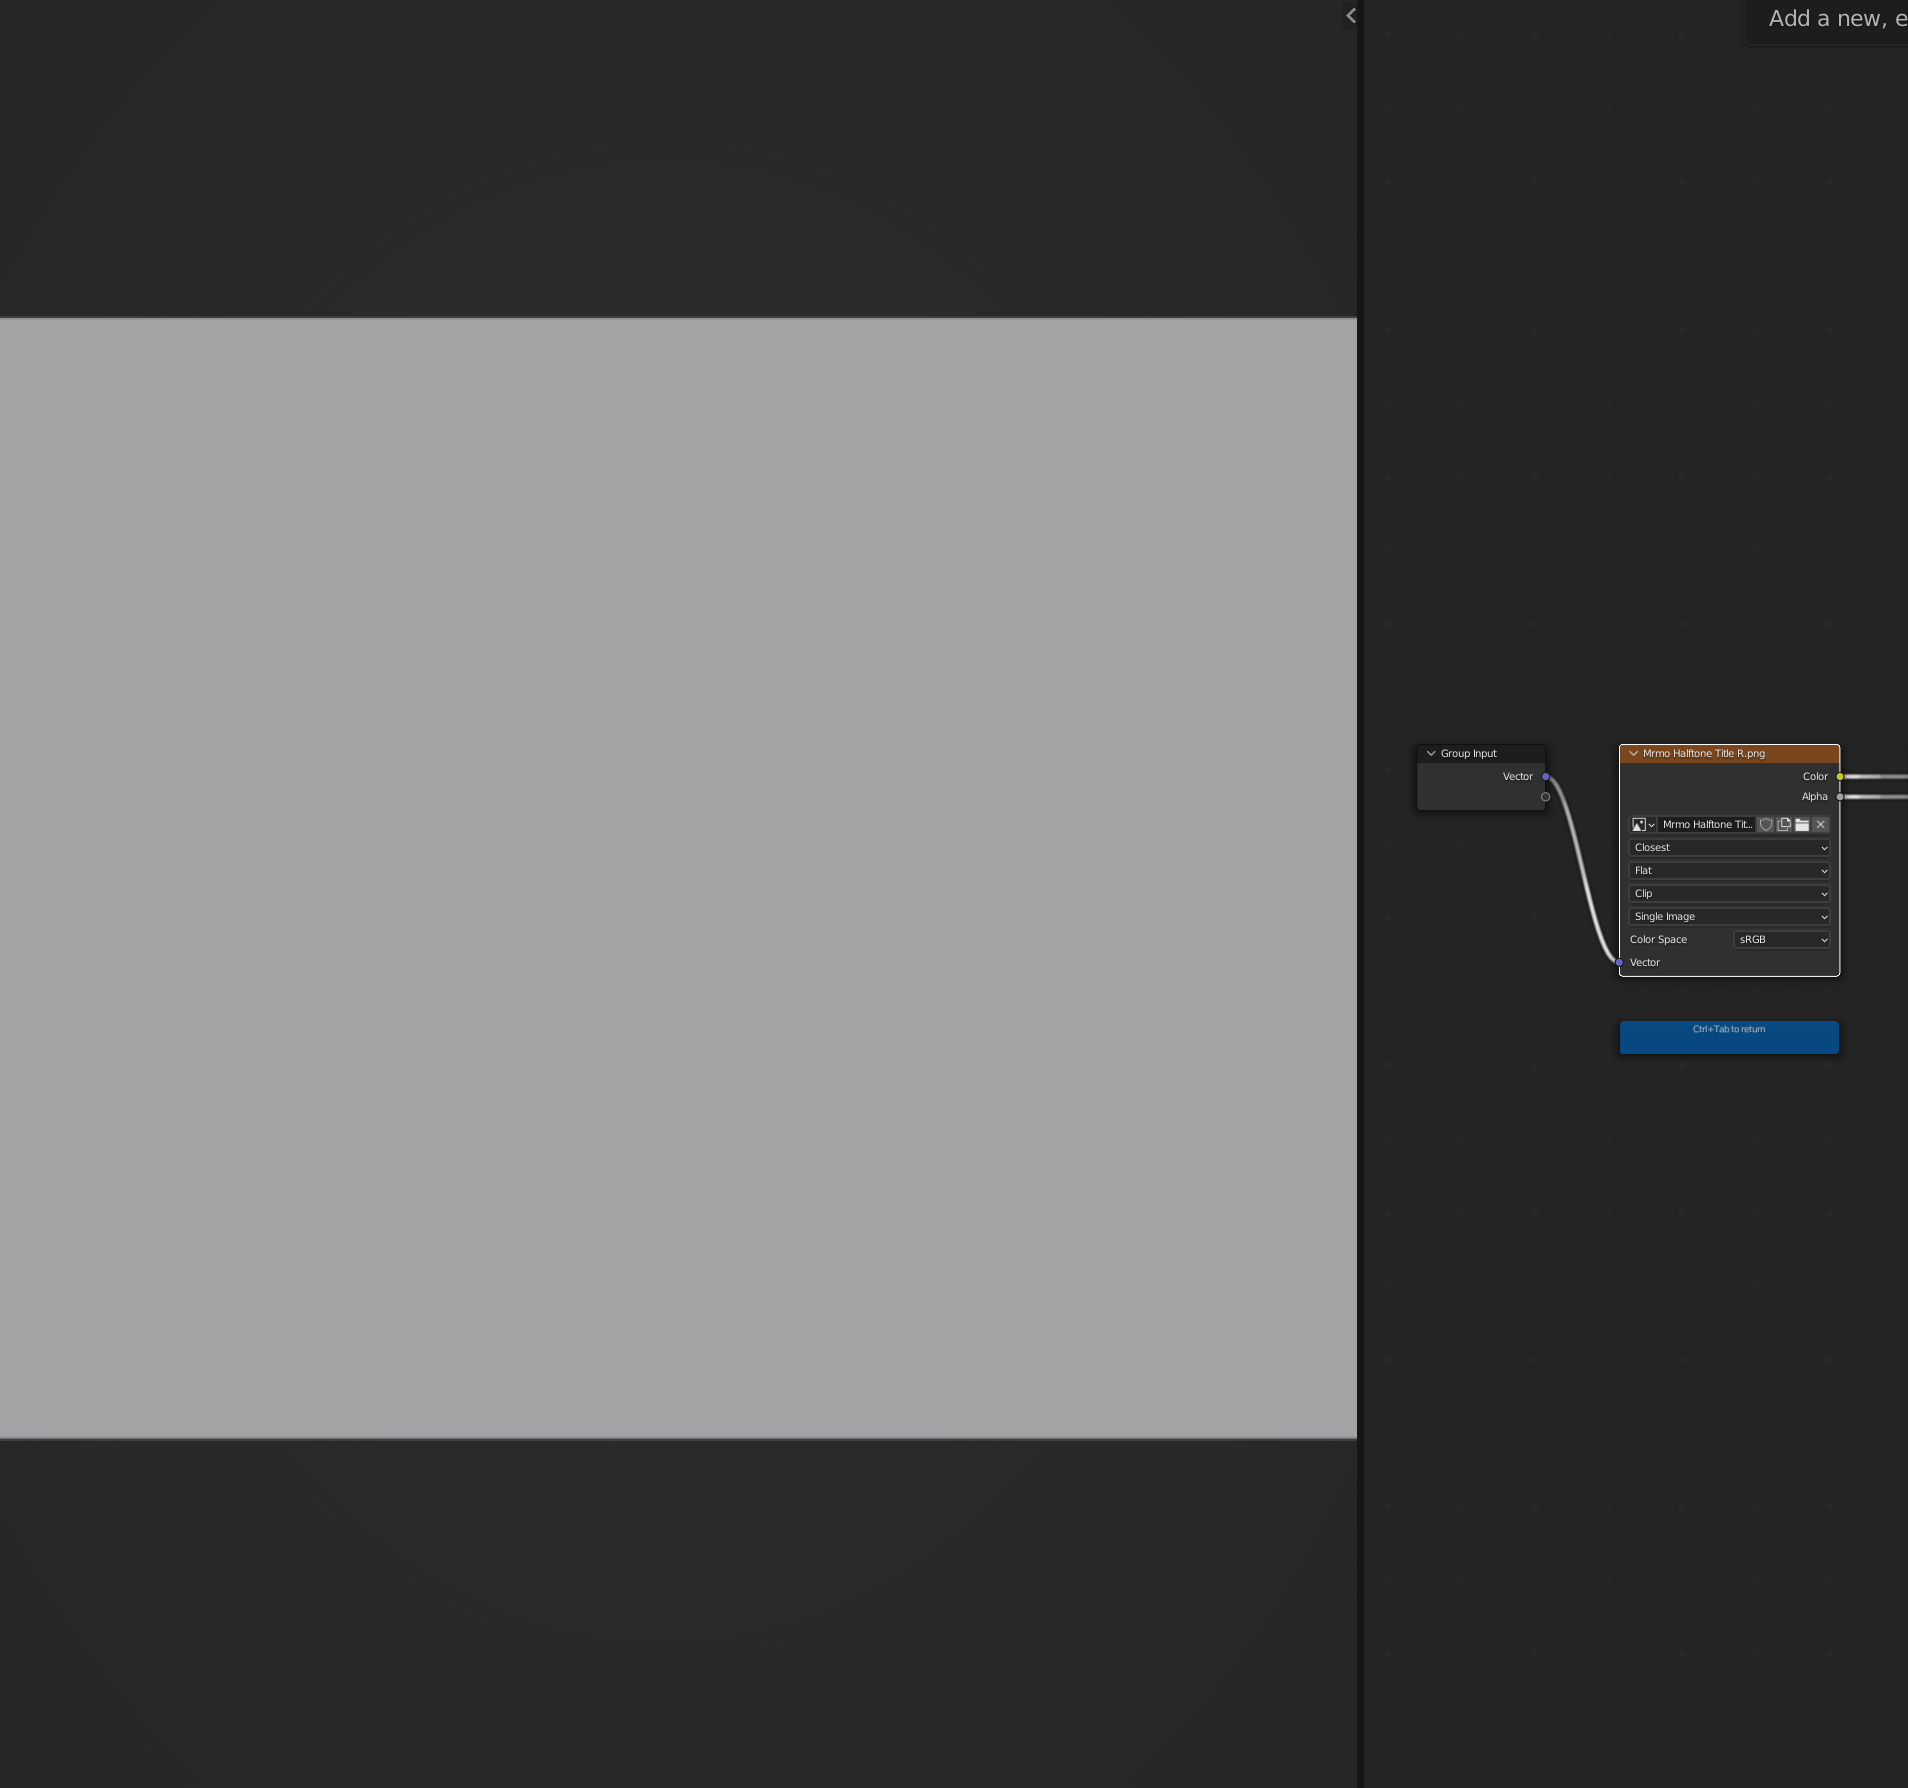
Yes, I'm in the process of making instructions! For now, here's this simplified version :)
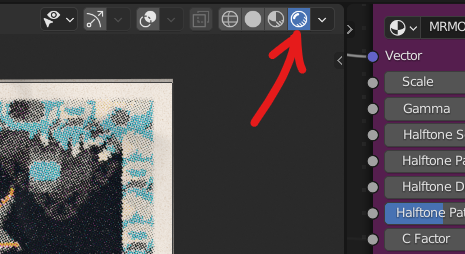
To preview the result, switch to "rendered" view:
Select the InputImage node and hit "Tab" to enter (but I see you already did this :)
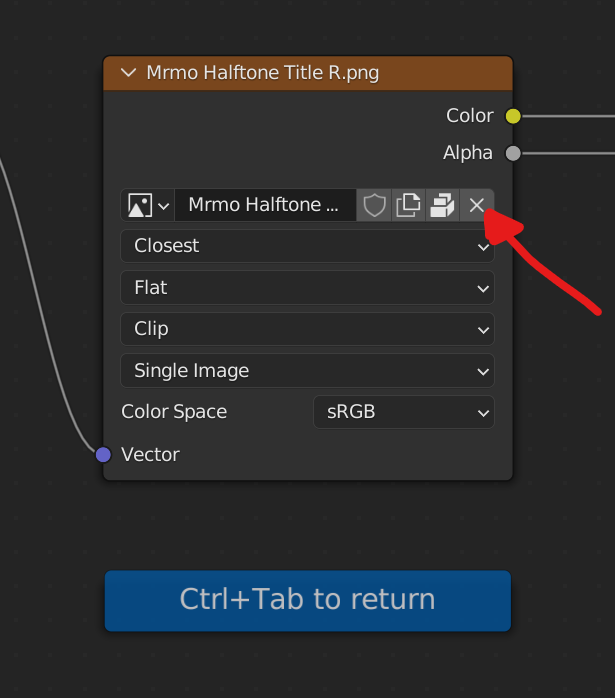
Clear the included default texture:
Load your own texture:
Set the rendering resolution and scaling here:
Hit "F12" to render, Alt-S to save the resulting render (or "image->save as").
"Esc" should return you from the rendered result to the original preview viewport.
thanks!
It is not easy for those not familiar with Blender nodes. Struggled myself before figuring it out...
Select the "Input Image" node, hit Tab to edit the group.
Then you can use the "Image Texture" node in the middle to select your source image.
With the Basic license can I use this for advertising, or should I purchase the Deluxe version? (Just genuinely not sure where advertising falls in the commercial/non-commercial space)
Without knowing the context, I couldn't really say. Depends on what the advertising is for :)
1. Are you getting paid to make the advertisement?
2. Are you making it for a commercial entity (i.e. a business)?
3. Is it advertising something that is intended to make money?
If you answered yes to any of those questions, I'm pretty sure the answer would be that it is commercial use, legally speaking. Of course, the creator can always choose to allow you to use it even if your use is commercial in nature
Thank you for the info! I ended up buying it anyway, partially just to be safe, partially because I do think it counts as commercial, and partially just to support the dev.
i like the look very halftone indeed. keep making amazing tools like this
I'll try my best :D
Another amazing tool! Keep up the great work, this is awesome!
Thanks! Glad you like it :D